
why make this recipe
Magic Peanut Butter Balls are a delightful treat that combines the classic flavors of peanut butter and chocolate. They’re perfect for any occasion—whether you’re looking for a snack, a dessert for a party, or a special surprise for your family. The best part? They’re easy to make and require no baking! These little bites are a sweet, creamy, and crunchy indulgence that everyone will love.
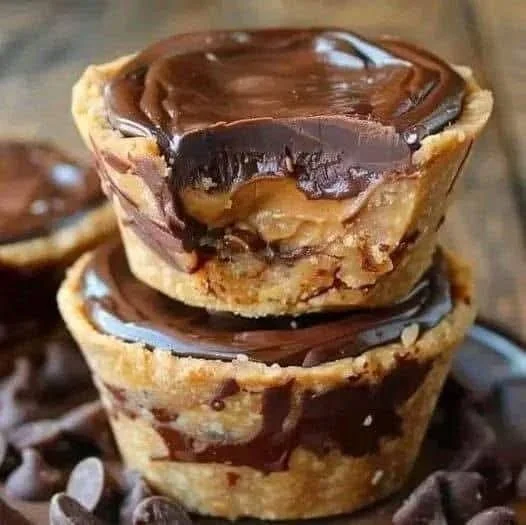
how to make Magic Peanut Butter Balls
Ingredients:
For the Centers:
- 1 cup (250g) Creamy Peanut Butter (not natural/oily)
- 1/2 cup (1 stick or 113g) Unsalted Butter, softened
- 1 teaspoon Pure Vanilla Extract
- 2 cups (240g) Powdered Sugar (Confectioners’ Sugar)
- 1 1/4 cups (125g) Graham Cracker Crumbs (about 9 full sheets)
For the Chocolate Shell:
- 2 cups (12 oz or 340g) Semi-Sweet Chocolate Chips
- 1 tablespoon Vegetable Shortening or Coconut Oil
Directions:
Method 1: The Creaming Method (for a Smooth Center)
- Cream the Fats: In a large bowl, mix the softened butter and peanut butter. Use a hand mixer on medium speed to beat them for 1-2 minutes until they are light, fluffy, and well combined.
- Incorporate Vanilla: Beat in the vanilla extract until just mixed.
- Combine Dry Ingredients: In a separate bowl, whisk together the powdered sugar and graham cracker crumbs for even distribution.
- Form the Dough: Gradually add the dry mixture into the peanut butter blend, mixing on low speed until a thick, pliable dough forms. It may be crumbly at first, but will come together. If it’s too sticky, add more powdered sugar. If too dry, add a teaspoon of melted butter.
- Portion and Shape: Use a tablespoon or small cookie scoop to portion the dough. Roll each section between your palms to create a smooth, 1-inch ball. Arrange the balls on a parchment-lined baking sheet.
- Chill to Set: Chill the baking sheet with the balls in the refrigerator for at least 30 minutes. This is important to keep them from falling apart during dipping.
Method 2: The Dipping Method (Creating the Perfect Shell)
- Create a Double Boiler: Simmer water in a small pot. Place a heatproof bowl on top, making sure it doesn’t touch the water. Add chocolate chips and shortening.
- Melt Gently: Stir occasionally until the chocolate is fully melted and smooth. Remove from heat.
- The Dip: Using a fork, dip a chilled peanut butter ball into the melted chocolate. Gently tap the fork on the edge of the bowl to remove excess chocolate.
- Final Set: Place the coated ball back on the parchment-lined sheet. Repeat this for all the balls.
- Setting the Shell: Let the chocolate set at room temperature for a nice finish. For quicker results, refrigerate for 15 minutes.
how to serve Magic Peanut Butter Balls
Serve Magic Peanut Butter Balls as a sweet treat for parties or gatherings. They are also great as an after-school snack or a quick dessert. Arrange them on a plate or in a jar, and watch everyone enjoy these bites of bliss!
how to store Magic Peanut Butter Balls
Store the Magic Peanut Butter Balls in an airtight container. They can last in the refrigerator for about a week. If you want to keep them longer, consider freezing them. Just make sure to layer them with parchment paper to keep them from sticking together.
tips to make Magic Peanut Butter Balls
- Use creamy peanut butter for a smoother texture.
- Ensure the butter is softened to help with easier mixing.
- Be patient when melting the chocolate; stirring will keep it smooth and prevent burning.
variation
For a different twist, you can add crushed pretzels to the peanut butter mixture for an added crunch or use white chocolate instead of semi-sweet for a sweeter taste. You can also roll the balls in crushed nuts, sprinkles, or coconut flakes before the chocolate hardens for extra flavor.
FAQs
1. Can I use natural peanut butter?
It’s best to avoid natural peanut butter for this recipe since it can be oily and affect the texture of the balls.
2. Can I make these gluten-free?
Yes! Just use gluten-free graham crackers or substitute them with ground oats or almond meal.
3. How can I tell if the chocolate is melted enough?
The chocolate should be smooth and glossy when fully melted. Stir continuously to avoid burning and ensure an even melt.
